Translate

Thursday, May 12, 2016

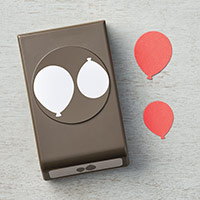
Go Wild Birthday Balloon


The Go Wild Designer Series Paper Stack (retiring) is a great source for masculine cards. If you find yourself struggling to make birthday (and other occasions) cards for the men and boys in your life, I highly recommend it!


The balloon is punched from a failed watercolor experiment, and I love how the bit of Gold Wink of Stella gives it a bit of glow.

**************************


Product List

Monday, May 9, 2016

Paper Pumpkin Monday: March Birthday Sunburst

The March kit (Pocketful of Cheer) came with some great card bases printed with a Pool Party spatter. I cut them up so I could make MORE CARDS! hahaha This card uses one of those card bases underneath the Bermuda Bay Sunburst cut. The sentiment is from a retired Sale-a-bration set, Party Pants. It is the perfect size for this circle layout. The dots were made with my Bermuda Bay marker. Sometimes a little doodling really makes the card shine!

*******************************


Product List

Thursday, May 5, 2016

Technique: Layered Watercolor Stamping

The Picture Perfect stamp set has been out on my desk for the last few months, because I just can't stop making pretty projects with it! This card features a simple but lovely technique: Layered Watercolor Stamping.

Start with watercolor paper and brush a very light coat of water where you want to stamp first. Then stamp your bottom layer of your 2 (or more) step stamp. Use your Aquapainter to lightly smudge the image and spread the ink around a little bit. Once you're satisfied with your image, use a paper towel to lightly dab off any excess water. Stamp your next layer, and smudge a little more. Continue this process, making sure to remove excess water with each layer before stamping again. When you are finished, use the Aquapainter again to spread a tiny bit of ink out from the edges of your image. This softens the borders and completes the watercolor look.

I used Layered Watercoloring on both the rose and the leaf images above. I love that this technique gives you an entirely different look with the same stamp set! I hope you'll give it a try and post your project in the comments.

******************************


Product List

Monday, May 2, 2016

Paper Pumpkin Monday: One Sheet Wonder Technique with All About Everything


One-Sheet-Wonder is a technique that's been around a LONG time! It's one we used to teach to beginning stampers more than a decade ago, and it still makes a beautiful card.

Choose a stamp set--here I used All About Everything, the bonus stamp set in the April Paper Pumpkin kit. You'll want a set with several images, some large and some small. Begin stamping with your largest image, then fill in with gradually smaller stamps. This gives you the best ability to balance out the look. You're really creating your own custom designer paper! You can use the colors most suited to your mood or to the recipient. I used Night of Navy, Marina Mist, Hello Honey (retiring), and Mossy Meadow (retiring).

I used the sketch from the Facebook page Bringing Birthdays Back. #imbringingbirthdaysback


Give it a try! Don't let techniques be intimidating. The worst thing that can happen is that you learn something to do differently next time.

******************************

Stamps: All About Everything (April Paper Pumpkin kit)


Product List

Thursday, April 28, 2016

Tutorial: Reverse Rose Garden Cut Outs

You can make so many amazing things with the Rose Garden Thinlits! I've shared a few hints on my Facebook page (fb.com/cardbuffet) on how to make these reverse rose images, so I thought I'd cover it in more detail here.

After you've made your die cut, carefully remove the outside edges (that you no longer need) and the die itself. You want to disturb the "bits" as little as possible, but sometimes they just get out of place. Nudge them back the best you can with a stylus or paper piercer while you still have the outline in place. Then remove the outline and apply Press N Seal to the remaining pieces. In the photo below, I laid the outline on top of the Press N Seal to make sure I lined up the missing pieces correctly. Sometimes only one or two try to escape, and other times it's a bit more time intensive!


Here is a photo with the two pieces separated.

The only step left is to apply Multi glue to the back of the pieces and adhere them to the card. This was quite a bit more difficult with Black Glimmer paper, or any glimmer paper. It notoriously takes a long time to settle into adhesives. Other cardstock or designer paper would be easier to work with. As you peel back the Press N Seal (as you would the liner of a rub-on), use your stylus or paper piercer to hold the pieces in place. You may have to nudge a few of them around before you're finished, but the extra time is well worth it!

Here is one I made with the Blushing Bride Glimmer paper onto Shimmery White cardstock.

I hope you enjoyed my little photo tutorial! I would love it if you left me a comment or posted your creations using this process!

*****************************


Product List