Translate

Monday, April 4, 2011

For all the amazing women

It's time to be thinking of what to give for Mother's Day. And it's not just for mothers, you know! Grandmothers, aunts, sisters, and friends are among the other women who mean the most to us. Or maybe you'd just like a good reason to treat yourself!

I'll be holding a Mother's Day class on Tuesday, April 26, with cards and gifts to make any of the important women in your life happy! RSVP (and payment) cutoff is 8 am Monday, April 18 so I can get the jewelry ordered in time!  If you can't make it on the 26th, there is a possibility of opening another night, or we can make the projects for you for a small fee. Please let me know if you are interested in one of those options.

** Simply Adorned pendant and chain with 12 beautiful inserts. $35

** Stationery set and card holder with 6 cards and envelopes. $15
** Mother's Day card and matching envelope. $2


Monday, March 28, 2011

Playing dress up


This was my club swap last week. Our theme was "something girly," and I thought this DSP would make a beautiful spring dress!

******************************
Stamps: Matchbox Messages
Paper: Baja Breeze, Rose Red, Springtime Vintage DSP
Ink: Baja Breeze
Accessories: Big Shot, Elegant Bouquet embossing folder, Scalloped Circles #2 die, Rose Red Seam Binding, Word Window punch

Friday, March 25, 2011

Going Vintage


Another club card from earlier this week! Aren't those vintage flower adornments gorgeous??? I didn't think I'd like them, but they are so yummy in real life. 


To make this flower, we ran our cardstock through the Big Shot with the lacy flower on the Fun Flowers die. Then we ran each flower through the crimper many times (approx 15) until the fibers broke down. You’ll see the layers begin to separate. Carefully pull each flower apart into 2 layers. Line up your flowers as desired (I put a Vanilla layer in the center) and poke a hole in the center. Insert a brad.


Lightly spritz your flower with water, and crumple up each individual layer. Allow to dry for a minute or so, then flatten. Adhere a Rose Red Vintage Flower Adornment to the center brad with a dimensional.


****************************
Stamps:  Teeny Tiny Wishes        
Paper: Very Vanilla, Rose Red, Crumb Cake, Springtime Vintage DSp (Mini 15, 121782)    
Ink: Crumb Cake    Accessories: Big Shot, Fun Flowers die, Vintage Wallpaper Embossing Folder, Vintage Flowers Adornment (Mini 15, 121879)

Wednesday, March 23, 2011

The Nature of Faux Silk


We made this card last night at club. What a fun time! We used the gorgeous set Nature Walk and--as promised--learned how to color ribbon roses with markers and aquapainters.


The faux silk technique is so easy to do, and I think it's striking on this card. Start with a piece of tissue paper (just regular stuff) that is larger than your finished image will be. Stamp your images--I suggest starting with the largest image and then adding progressively smaller ones. We added color with markers and the color spritzer tool. Then crumple your tissue paper up into a tiny little ball. Really squish it! 


Cover your cardstock with Stampin Up glue stick--making sure to get all the way to the edges and corners! Un-crumple your tissue paper and flatten it a bit, leaving lots of little wrinkles. Then carefully set the tissue paper on top of the gluey cardstock. Don't spread the tissue paper out--flatten it into the glue, wrinkles and creases and all. This is what makes it faux silk! Trim the edges and add to your card. 


I hope you'll give this technique a try!


*****************************
Stamps: Nature Walk (Mini 27, 121997)    
Paper: Marina Mist, Botanical Gazette DSP (Mini 26, 121783), Very Vanilla, tissue paper
Ink: Marina Mist, Early Espresso, Cherry Cobbler    

Accessories: Vanilla Rosettes (Mini 16, 118774), Early Espresso Taffeta ribbon (191), Linen Thread (190), Color Spritzer (195)

Saturday, March 19, 2011

The Nature of a Rose


This is a project I made at the Boise Regional. We learned a great technique for coloring the vanilla ribbon roses available in the Occasions Mini Catalog. We'll be learning how to do it at club on Tuesday--be there or be square!

********************
Stamps: Teeny Tiny Wishes, Nature Walk
Paper: Early Espresso, Naturals Cream
Ink: Early Espresso, Artichoke and Cobbler markers
Accessories: Ribbon roses

Thursday, March 17, 2011

Eggs of the world


I think the way I colored the eggs on this stamp makes them look like little egg planets. I'm a little obsessed with eggs these days, as our chickens and ducks--after taking the winter off from laying--are making eggs like crazy! 

And it has a lot of green on it, so I think it should count for St. Patrick's Day! 


This is a project we made at the Boise Regional Convention presented by Stampin' Up! Well, some people made it there. I made it at home and spent my time chatting with friends. I am really enjoying working with this set, Nature Walk. I'll be posting more of the Regionals Make and Takes in the next several days. 

****************************
Stamps: Nature Walk, Thank You Kindly
Paper: Naturals Cream, Old Olive, Early Espresso
Ink: Early Espresso, Old Olive, Marina Mist
Accessories: Crimper, Old Olive Taffeta, Dotted Scallop Ribbon Punch

Tuesday, March 15, 2011

Sale-a-bration baby


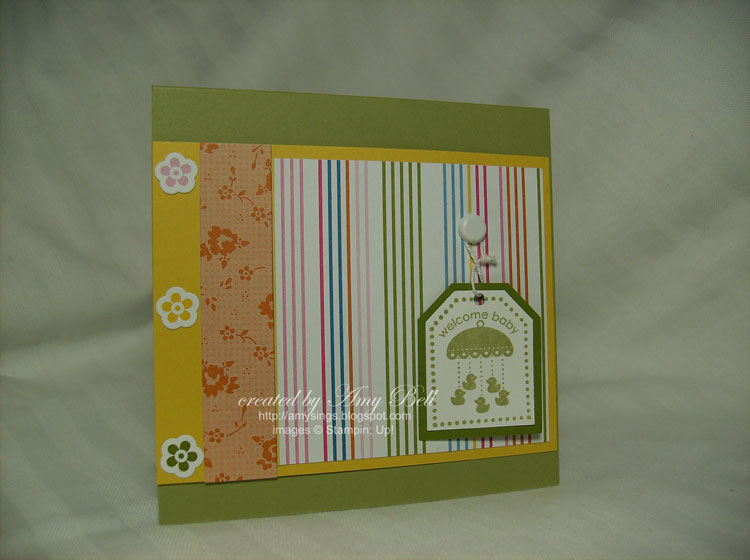
I used the Sale-a-bration products Ice Cream Parlor Pack and Punch Bunch to make this baby card. The fact that everything is already coordinated makes it fun and easy! Almost as good as eating ice cream! 

*******************************

Stamps: Punch Bunch
Paper: Pear Pizzazz, Daffodil Delight, Whisper White, Ice Cream Parlor DSP
Ink: Pear Pizzazz
Accessories: Tag Punches, Neutrals brads 5/8", crochet thread, Ice Cream Parlor Quick Accents

Saturday, March 12, 2011

For Always


This is a swap I made for the Boise Regionals. I only made 12, so I felt like I could make them a little more involved than a regular swap. The background piece is Very Vanilla stamped with the focal image (from Always Elegant--available free with purchase during Sale-a-bration!) and embossed. I did a little shading with Always Artichoke ink so you could see the embossing a bit better. The mail image is also embossed--Always Artichoke ink and clear embossing powder. I love the little pearl on it! I found this sketch somewhere on the interwebs, but now I can't find it again. Please let me know if it's yours! 

*****************************
Stamps: Always Elegant, Tiny Tags
Paper: Always Artichoke, Rose Red, Very Vanilla, Springtime Vintage DSP
Ink: Versamark, Always Artichoke Craft and Classic
Accessories: Big Shot, Scalloped Square Duo Die, Rose Red Seam Binding, Linen Thread, Medium Jewelry Tag Punch, Basic Pearls, dimensionals